
Table of Contents
Building your own custom PC case can be a daunting task, especially if you are not experienced with DIY stuff. There are many things that you must take into account when building a case, such as a layout, airflow, size, antistatic properties, acoustics, esthetics, and so on. Nonetheless, the final results will speak for themselves once you have a unique case that you created yourself and can be proud of.
You will also need tons of different tools for your build. At the bare minimum, if you are building a wooden case, you will need some tools to cut and shape the wood. You will also need lacquer, brushes, a drill, and many other things such as different sized files to make everything nice and smooth.
This is a general guide on how to build a PC case using different materials, tools, design, and so on. If you wonder about the benefits and disadvantages of building a custom case over going with a traditional pre-built one.
Consider Modding Over Building a Custom Case
Just to drive the point home, if you only want to build a custom PC case just to have a few more features, perhaps modding is a better option. There are many creative solutions that you can find for your problem, such as adding more space by cutting off unnecessary parts or switching the layout up completely.
It does not matter what sort of features you are looking for in a PC case, chances are there is a case that suits you. Modding is much easier than building a case from scratch for obvious reasons. You will not have to worry about the layout, airflow, build quality, and so on.
While you will most likely be restricted to the shape that you get, you can get some amazing results by adding some materials and painting the panels into the color that you want. If you want to get inspired, look at some custom Fallout or World of Warcraft cases and you will see how amazing they can be, even with a pre-built case.
Nonetheless, if you want to build a PC case that is a shape other than a rectangle, you will probably have to do it yourself. After all, that is what you came here for in the first place, so let’s get to it.
Design and Plan
The first step to actually building your custom PC case is to plan it out well. Remember, the design is the most important reason why you are doing this in the first place, so spend as much time as you need to create a design that you are going to love for years.
You will also have to plan out a budget before getting the materials. You can make a case for as cheap as $15 with stuff from the dollar store. However, if you plan to use copper for the best thermal conductivity, or want a huge custom desk, prepare to spend $300 or even more.
Your custom case can be as simple as a minimalist wooden box with a gorgeous varnish that looks incredible. But it can also be an incredibly complex desk PC with a custom water cooling loop with all the components showcased under a huge piece of tempered glass. It does not matter what you decide to do, planning the layout is the most important step.
Imagine finishing the whole setup after weeks of work only to realize that you completely forgot to allocate some space for storage or did not think about where the I/O should be. You will also need to create a layout with the right dimensions for your components.
This means that your case has to be a certain height and length for your graphics card, you need to think about the motherboard size and where the standoff screws should go, and where the HDDs should go.
While designing your custom PC case, think about upgradability too. Even if you buy one of the largest graphics cards available today, like the RTX 3090, nobody can guarantee that your next graphics card will not be even larger than that. This applies to both vertical and horizontal GPU mounts.
Motherboards, case fans, SSDs, HDDs, and power supplies have stayed the same for generations and it is likely to continue. Nonetheless, try not to make anything too tight because there is a small chance that a future motherboard will be half an inch long and you won’t be able to put it in.
Another important thing that most people do not think about until it is too late is the airflow. It does not have to be incredible, but if your components are suffocating, they will overheat, downclock, and die quicker. All components need some sort of cooling, even HDDs, so bear that in mind when designing the case. Pay extra attention to the graphics card, CPU, and power supply unit.
Speaking of things that nobody pays attention to, acoustics is one of them. If you mount your case fans onto smooth surfaces, such as glass, the glass will resonate and create significantly more noise. You can use foam in some places to dampen the noise, but you can’t do anything if you did not design the case carefully.
Once you have completed your design and you are happy with it, it is time to move on to the next step. Alternatively, you can easily find a service that will build the case that you designed and ship it to you. While expensive, the results are probably better than what anyone can make at home since those services use CNC machines to cut all panels extremely precisely.
Choose the Right Materials
After the design is done, choosing the materials that you want is the most important thing when building a PC case.
The most popular materials are the following:
- Wood
- Tempered glass
- Acrylic
- Steel
- Aluminum
- Plastic
- Copper
- Vinyl wrap
All materials have some upsides and downsides. If you are an artistic person and love minimalism, wood is one of the most popular choices. If you prefer a more industrial look or just want the best cooling possible, copper, steel, and aluminum are great choices. Naturally, you can and probably should mix and match these materials to get the most out of it.
Some of the most popular choices for custom cases are a combination of tempered glass or acrylic and steel or aluminum. You can also get some super-cheap poster boards from the dollar store but note that they are quite flimsy and won’t be able to hold an aftermarket CPU cooler or a huge graphics card.
If you are going for something premium, one of the best materials is copper. Copper is an amazing choice for a steampunk-themed PC case to get that super-industrial look as if it came straight out of the Victorian era.
You can also go for a combination of tinted/regular tempered glass and steel or aluminum to get a more traditional case look. It is also a great combination of unorthodox shapes like pyramids and cubes.
Regular plywood from a hardware store is also an excellent choice. It is sturdy, gorgeous, easy to work with, and you can choose different types of wood and varnishes. You can also experiment with epoxy resin for a truly unique PC case, provided that you have some previous experience using it. All things considered, it is probably the best choice for a custom case, unrelated to the cost.
You can also use the vinyl wrap on pretty much all surfaces you want to get a specific finish and texture that you want. Your choices of color and texture are limitless. The only thing that you should remember is that you should put the vinyl wrap on all pieces before starting assembly as it will be much easier to do it that way.
A tip for vinyl wrapping: Use a heat gun or hairdryer to cover the edges of holes and other hard-to-reach places.
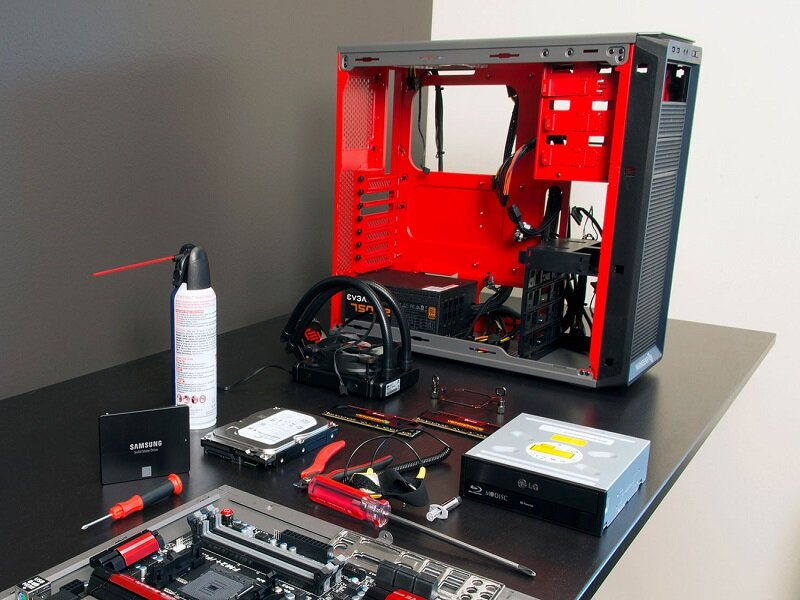
Finding Materials, Accessories, and Glue
You can find almost everything you need in a dollar store and in a hardware store. Due to the ongoing pandemic and the development of online retailers, finding whatever materials and accessories you need is very easy on the Internet too. Just double-check the dimensions when buying online to both save time and money.
Remember that you will also need a power button. You have a few options here. You can take out one from an old case, buy one online or in an electronics store, or, if you are good with electronics, you can make your own power button and wire it yourself. The first two options are the best for most people.
Getting some RGB led strips is also a great idea and perhaps some EL wires to light everything up. You can achieve incredible results with these simple accessories to get a case that looks more like an end product than a DIY project.
It is also a good idea to buy some standoff screws for your fans, motherboard, power supply, and other components. While you are at it, buy some noise-reducing vibration screws and maybe some padding so that you do not damage your components when mounting them. You can find that in almost any electronics store or online.
When it comes to the glue, this again depends a lot on the materials you use. Hot glue, wood glue, epoxy, superglue, and polyurethane are all viable options. Check the packaging to see on what surfaces it can be used.
The two most important factors that you must pay attention to are strength and heat resistance. Strength is self-explanatory, but the maximum heat can play a big role since your GPU and CPU easily reach 85°C.
Get All the Tools You Will Need
Now that you have designed your case and bought the materials you want to use, it is time to get the tools that you are going to need.
No matter what material you get, you will need the following tools:
- Measuring tape and a ruler
- A pencil or a pen
- A spirit level
- A power drill
- A few screwdrivers and screws for mounting
There are some other things that you will need for cutting the material you have chosen. If you are working with metal, you will probably need an angle grinder. Likewise, for wood, you will need a coping saw both for making holes and cutting everything into shape. You will also need a rasp, a file, or some sandpaper to sand down holes and rough edges for a smoother finish.
Remember that whatever tools you use, this can be a very dangerous project and you can end up hurting yourself or someone else. Do this at your own risk.
Build the PC Case
Now you are ready to start working on your custom PC case. Assuming that you planned everything thoroughly, you should first start by cutting all the pieces that are going to be your PC case panels. The material you decided to use dictates how you cut it.
When you are done with all the panels, try to put them together just to see if they fit. You can use push pins on softer materials for that purpose. You can also use some adhesive or masking tape for this, but make sure that it does not leave any residue behind when you remove it. Alternatively, ask a family member very nicely to hold some parts for you with the promise of taking them out for dinner later.
The next step is to make some holes. Drills and coping saws will do the job for most materials. Make sure to use a pencil and measuring tape to get everything exactly where you planned. After cutting and drilling, use files and sandpaper to make all the edges and holes as smooth as possible, and then clean everything with a wet cloth. If you are planning to use vinyl tape, now is the time to do it. It would be much harder to do later.
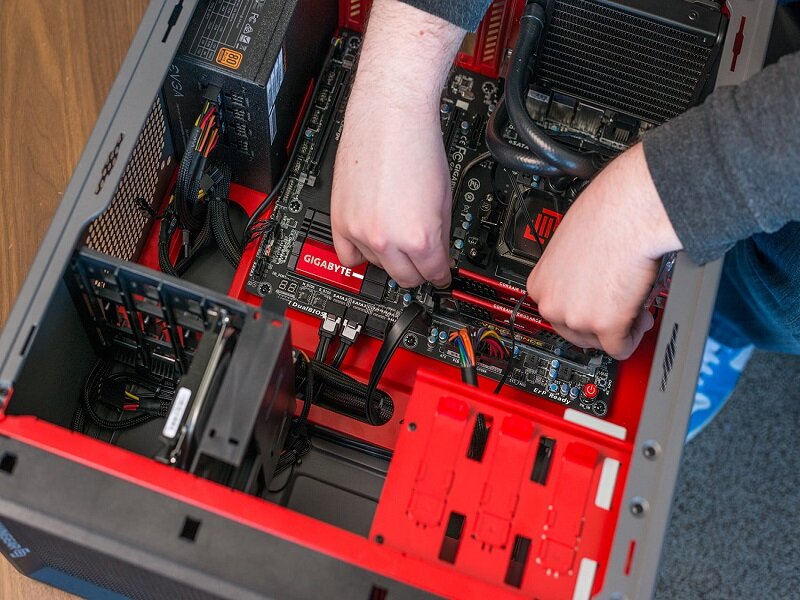
With everything cut and ready to go, it is time to glue everything into place. Do this slowly and patiently, because you will have to start over if you mess something up. After the glue is set, start mounting brackets, standoff screws, buttons, I/O, case fans, LED lights, and whatever else you have.
Then you simply put in the PSU, route all the cables, add the motherboard, storage, graphics card, and other components. Plug everything in and you are pretty much done. You can now enjoy your gorgeous new PC case and start using it right away.
Advantages and Disadvantages of a Custom PC Case
The main advantage is that you can build it exactly how you want and need it. You can make it as big or as small as you want, use whatever materials you like, and even make it into any shape you want. You are not constrained to the same old rectangular PC case shape that everyone has. The flexibility that you get from a custom case is hard to beat.
The price can both be significantly cheaper or significantly more expensive, depending on the materials and size. If you use cheap plywood or poster boards and have all the tools you need, you can probably make it under $20. However, if you are using copper or other metal and need to have it cut instead of doing it yourself, then the price can quickly climb and you will end up with a figure of around $600.
The disadvantages are hard to ignore with DIY cases, though. You will have to allocate a lot of time to planning, gathering materials, and building. You also do not have any standard holes, so you will have to do it yourself. Also, any mistake that you make will cost you money and time, which is not the case with regular models.
Conclusion
Building a PC case yourself can be a fun project that will produce some incredible results. While a traditional case from a reputable manufacturer is much more convenient, you have very little space to add a personal touch and make it unique.
It can take anywhere from a few days to a few months. The same applies to the price of the DIY route. The materials, size, and complexity of your custom case dictate how much time and money you will have to allocate. If this is your first project, try to get cheap and easy-to-get materials. You can still get incredible results from some cheap plywood and vinyl wrap.
Creating a good design and getting all the materials and tools will take much longer than the actual building process, which is why the main focus of the article is preparation. How you build and cut all the materials is up to you. If you are not familiar with power tools or any sort of DIY work, getting some help from a professional or some friends is a good idea.