Table of Contents
You woke up, grabbed a hot cup of coffee, and pressed the power on button to start working today. Your computer starts to boot up but suddenly shuts down after 4-5 seconds. Or perhaps it didn’t turn on in the first place. You know that there wasn’t a recent power outage because you have just used your coffee maker a moment ago.
First, don’t panic. Take a deep breath and calm yourself down. There is a big chance that nothing is wrong with your hardware. Naturally, the first thing that you should do is the good old unplugging it and plugging it back in. Also, check if you haven’t accidentally switched the power button off on your power supply in the rear.
If you have tried all that and your computer still is not working, then you may have a problem with your CPU. So, how to tell if your CPU is dead? There are a few things that you can do to check it, so let’s get to it.
How to Tell if Your CPU Is Dead?
1. Try the CPU in a Different System
This is the most effective way to check your CPU. Unplug everything, remove the side panel, remove the CPU cooler, and carefully remove your CPU from the motherboard socket. After that, bring it to a friend or a nearby computer store. Just make sure that the CPU and the motherboard are compatible before attempting this step.
This may not be the easiest and most convenient way to check your CPU, but it will tell you whether something is wrong with your CPU or another component. If your CPU or computer is still covered under warranty, check with the place you got it from instead of doing this on your own as it will void your warranty.
If you have brought your CPU to a friend or a store and the CPU still does not boot, then it is dead. But if it works just fine here, then maybe something is wrong with your motherboard, RAM, power supply, or another component.
This is a sure-fire way to check if your CPU is dead, but it is also extremely inconvenient, especially if you do not know anyone who has a motherboard with the same socket. Luckily, there are some other ways to check.
2. Undo What You Did Previously
If the CPU worked fine a moment ago, but you made some changes to your system, either hardware or software, then this step should be pretty obvious. This is especially true if you installed new RAM or perhaps a new CPU cooler into your system. Whatever you did, try to undo it and check if the problem persists.
Remember to stay calm while doing anything that has to do with computers, especially hardware. One wrong move could cause irreversible damage. Also, remember to ground yourself by wearing an antistatic wrist strap or by touching the computer case before touching any components. There are many other things that you can do to check your CPU if this didn’t help either.
3. Reseat Your CPU & Change Your Thermal Paste
This is another great way to give your CPU another chance before replacing it. Reseating your CPU means taking it out and putting it back in. You could say that it is a more elaborate way to attempt to plug it out and plug it back in. Remember to get some thermal paste before attempting this step.
If your CPU is not working due to overheating issues, this could be a solution as well because a fresh application of thermal paste can do wonders for CPU temps.
Even if your CPU has been working without any problems for months, reseating is still a good idea, especially if you don’t have access to another system to try your CPU there.
Here is a step-by-step guide on how to do it:
-
-
- Unplug all cables, lay your computer on a large flat surface (avoid carpets), ground yourself, and open the side panel.
- Locate your CPU. It sits below a heatsink with a fan on the top middle part of your motherboard.
- Unplug the 3-pin or 4-pin header of the CPU fan. You can identify it by looking where the cable from the fan is plugged in, which is typically on the right side of the CPU. Make sure not to use any force and to pull upwards.
- Unlatch the clips or undo the screws that hold the cooler. The exact mechanism varies, so make sure to consult your CPU cooler manual beforehand.
- Gently remove the heatsink.
- Release the locking lever for the CPU. It is a thin, long piece of metal that lies horizontally to the CPU. You have to pull it to the side slightly and then it will pop up.
- Carefully remove the CPU. This is an opportunity to examine whether any pins have been damaged on your CPU if it is a brand-new one and your computer did not work from the get-go. Put the processor back in and put the latch back in place as well.
- Remove the old thermal paste from the CPU and heatsink using isopropyl alcohol and dry cloth. If you do not have isopropyl alcohol, do not use hand sanitizers (which all of us have plenty of) or any other liquid. Simply do it with a dry cloth. It will take longer, but it will come off eventually.
- Apply a fresh glob of thermal paste. Do not use too much. The size of a garden pea will do the job.
- Put back the CPU cooler the same way you removed it. Plug the CPU fan back in as well. Close the computer case.
-
After you have followed all these steps, plug everything back in, and check if it works. If your computer turns on, make sure that the CPU fan is spinning. If it is not, you either did not plug it in properly or it is broken.
If your CPU was shutting down after a few seconds due to overheating, the fresh application of thermal compound should fix it. If not, there is one more step that you can try.
4. Reset Your BIOS and Reseat Your RAM
Resetting your BIOS is possible by removing the CMOS battery and then putting it back in. Just like with the previous step, unplug everything and lay your computer onto a flat surface.
Then do the following:
-
-
- Find the CMOS battery. It is a shiny circular battery that is on the bottom side of the motherboard. There is a big chance that your graphics card is in the way. If it is, remove it as well.
- Remove the CMOS battery by pushing the latch.
- Put the CMOS battery onto the table and wait for 5 minutes.
- Put the CMOS battery back in and plug everything back in.
-
Now check if your computer posts by turning it on. If not, you can also reseat your RAM. It is the same procedure as with the CMOS battery. Simply unlatch the RAM sticks on both sides and remove them for a few minutes then put it back in.
Why Do CPUs Die?
There are several reasons why your CPU can die or fail. First of all, if you bend a pin while installing the CPU, it will not work. Also, if the CPU got damaged during shipping or there is a problem from the factory, there is a big chance that it will stop working after a few days or months.
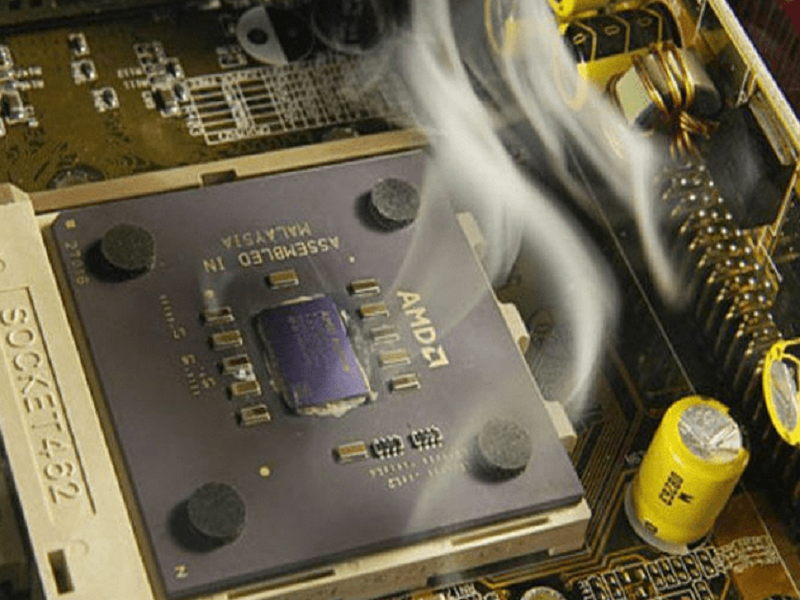
However, if you have been using your CPU for a year or longer and it suddenly stopped working, then maybe it got fried from overheating or high voltage. Overheating happens if the CPU fan is not working properly or if the thermal compound is dried out. Problems with voltage are related to the power supply and sometimes the motherboard.
If you have an old power supply (PSU) or if it’s from an unknown manufacturer, replace it before buying a new CPU because there is a big chance it will happen again. Old and unreliable PSUs might have blown capacitors that are not only dangerous for your computer but for your whole house.
Conclusion
We sincerely hope that your computer started to work again after any of these steps. CPUs can last a long time and are far more likely to be made obsolete than die. The best and most reliable method to check if your CPU is dead is by taking it to a professional or trying it in a different system.
The method is not very practical for most people, but there are other steps that you can try before buying a new CPU. If your CPU is still under warranty, try to RMA it first because you may get a replacement for free. Also, if you have a sketchy power supply, please replace it. While you’re at it, replace the ancient thermal paste as well to prevent overheating.


